Getting Started
Option 1: Import a model
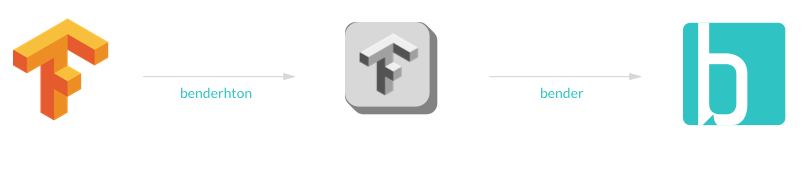
Bender includes a TensorFlow converter which lets you import a model directly. Other converters are coming soon and you can also write your own. You can use benderthon to export your TF model.
Swift Code Example
import MetalBender
let url = Bundle.main.url(forResource: "myModel", withExtension: "pb")!
let network = Network.load(url: url, inputSize: LayerSize(h: 256, w: 256, f: 3))
network.run(input: ) { output in
}
Option 2: Load the weights
Bender also provides a modern API to create and run the layers of a model. You can define your network using the Bender API and then load the weights from binary files. This approach can be simpler if you are using custom layers and don’t want to fiddle around with parsers and converters.
Bender also provides a modern API to create and run the layers of a model. You can define your network using the Bender API and then load the weights from binary files. This approach can be simpler if you are using custom layers and don’t want to fiddle around with parsers and converters.
TensorFlow model definition (Python):
def style_net(image):
conv1 = conv_layer(“conv1”, image, 32, 9, 2)
conv2 = conv_layer(“conv2”, conv1, 64, 3, 2)
conv3 = conv_layer(“conv3”, conv2, 128, 3, 2)
resid1 = residual_block(“res_block1”, conv3, 3)
resid2 = residual_block(“res_block2”, res_block1, 3)
resid3 = residual_block(“res_block3”, res_block2, 3)
resid4 = residual_block(“res_block4”, res_block13, 3)
convt1 = conv_transpose_layer(“convt1”, resid4, 64, 3, 2)
convt2 = conv_transpose_layer(“convt2”, convt1, 32, 3, 2)
convf = conv_layer(“convFinal”, convt2, 3, 5, 1, relu=False)
net = tf.nn.tanh(convf)
return net
Same model on Bender:
styleNet = Network(device: device, inputSize: inputSize, parameterLoader: loader)
styleNet.start
->> Convolution(size: ConvSize(outputChannels: 32, kernelSize: 9, stride: 1), id: “conv1”)
->> Convolution(size: ConvSize(outputChannels: 64, kernelSize: 3, stride: 2), id: “conv2”)
->> Convolution(size: ConvSize(outputChannels: 128, kernelSize: 3, stride: 2), id: “conv3”)
->> Residual(size: ConvSize(outputChannels: 128, kernelSize: 3, stride: 1), id: “res_block1”)
->> Residual(size: ConvSize(outputChannels: 128, kernelSize: 3, stride: 1), id: “res_block2”)
->> Residual(size: ConvSize(outputChannels: 128, kernelSize: 3, stride: 1), id: “res_block3”)
->> Residual(size: ConvSize(outputChannels: 128, kernelSize: 3, stride: 1), id: “res_block4”)
—>> ConvTranspose(size: ConvSize(outputChannles: 64, kernelSize: 3, stride: 2), id: “convt1”)
—>> ConvTranspose(size: ConvSize(outputChannles: 32, kernelSize: 3, stride: 2), id: “convt2”)
->> Convolution(size: ConvSize(outputChannels: 3, kernelSize: 9, stride: 1), neuron: .tanh, id: “convFinal”)